Team:AshesiGhana/Engineering
ENGINEERING SUCCESS AND PREDICTED LAB WORK
Our team is considering a two-phase project, the design phase for this year, and the implementation phase for next year. For the second phase of our project which would be implemented in the lab, we envision to use the lab protocol designed below:
- Obtaining the (pSB1C3) plasmids and synthesize the other genes of interest with their respective promoters and the other necessary parts
- Digestion of plasmid and respective genetic or DNA sequences using the chosen restriction enzymes (EcoRI and XbaI to cut the vector and EcoRI and SpeI to cut the insert).
- Ligation of the compatible ends of the plasmids and DNA sequences using the appropriate ligation buffer under the right conditions.
- Transformation of the cloned plasmid into the V. natriegens bacteria.
- Using a Chloramphenicol antibiotic LB agar plate, the transformation is pipetted onto the agar plate and with a sterilized spreader or glass bead, is spread onto the plate
- Picking single colonies from transformations and growing cell cultures for further studies.
- Mini prepping to extract plasmid DNA from the bacterial cell suspension.
- Further digestion is performed, and gel electrophoresis is done for each of the five recombinant plasmids to verify the plasmid and check if the DNA is present in the plasmid.
The plasmid (pSB1C3) and other two recombinant plasmids which are cloned with inserts
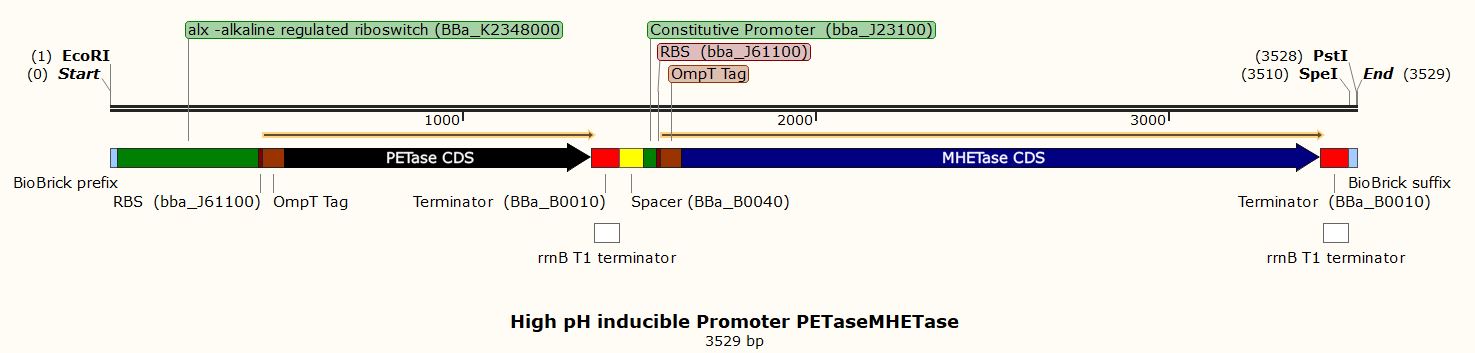
for plastic degradation (one with a constitutive promoter and the other a high-pH inducible
promoter) are cut with EcoRI and SpeI. The other three recombinant plasmids for the biocementation
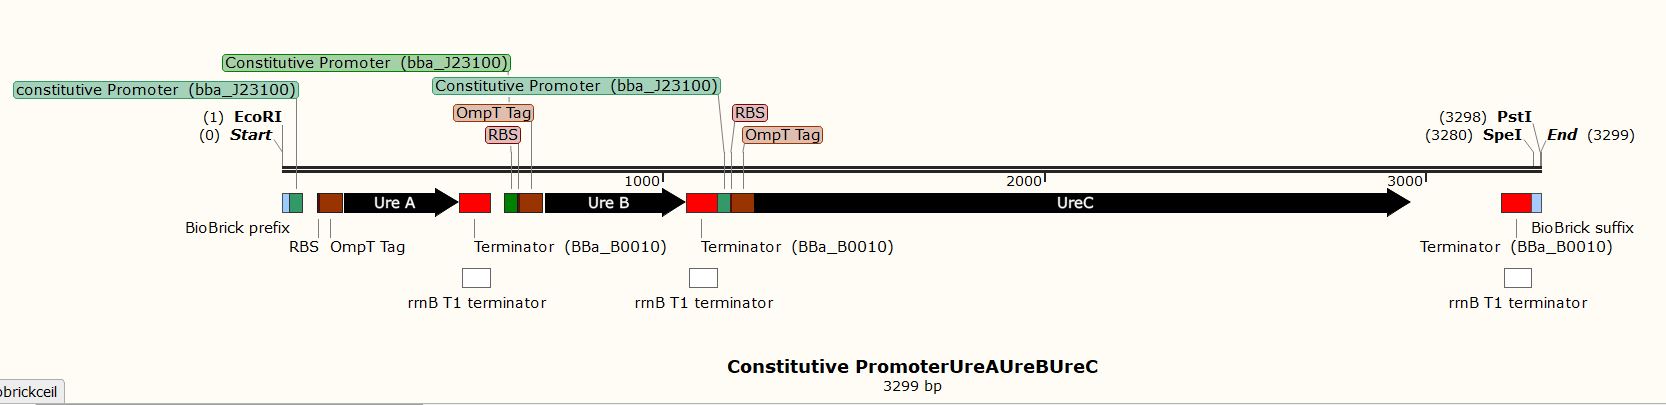
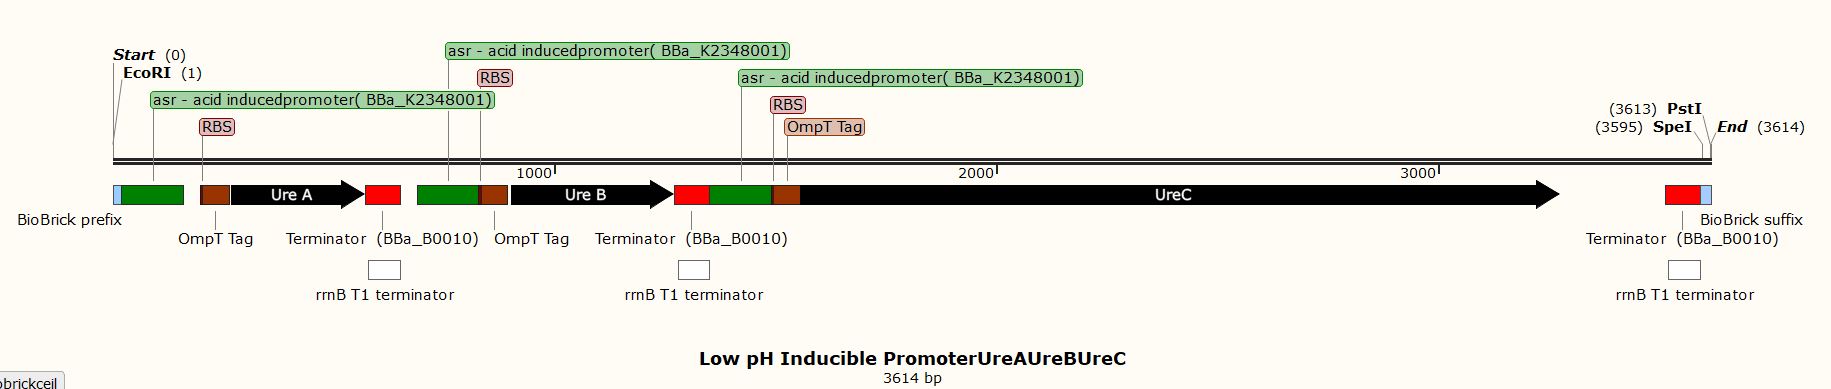
process (one with a constitutive promoter another with a high-pH inducible promoter and the last
one with a low pH-inducible promoter) are cut with the restriction enzymes EcoRI and NruI.
Two bands are obtained for each lane however the lane containing the non-cloned plasmid
would only have one band visible since the second band is very small to be visualized.
For the cloned plasmids, two visible bands are obtained; one representing the size (number of base pairs)
of the backbone and one the size (number of base pairs) of the new insert.
For V. natriegens with pH inducible promoters (PET degradation & biocementation) and light-inducible
promoters, the culture would be prepared at the pH and wavelength that will trigger the translation
process for PET degradation and biocementation respectively. The experimental procedures described
earlier will be applied in this situation.
Currently, we have not established an experimental technique that will aid the evaluation of the parts under an inducible promoter, but it is something we will work on in the coming year.
Due to the inability to be in the lab this year, we performed experiments in silico using the SnapGene Software. After obtaining our genetic parts and coding sequences from the UniProt database or peer-reviewed articles, we used Snap Gene to clone the vector (pSB1C3) to obtain five (5) recombinant plasmids which had different inserts pertaining to the role they performed in our project. We used the Restriction Enzyme Cloning assembly method while adhering to the BioBrick Standards using the restriction enzymes, EcoRI, XbaI, and SpeI. The vector was cut with EcoRI and XbaI and the inserts with EcoRI and SpeI. These five recombinant plasmids included the following inserts:
-
A plastic biodegradation insert with a constitutive promoter

-
A plastic biodegradation insert with a high pH inducible promoter
-
A biocementation insert with a constitutive promoter
-
A biocementation insert with a low pH inducible promoter
-
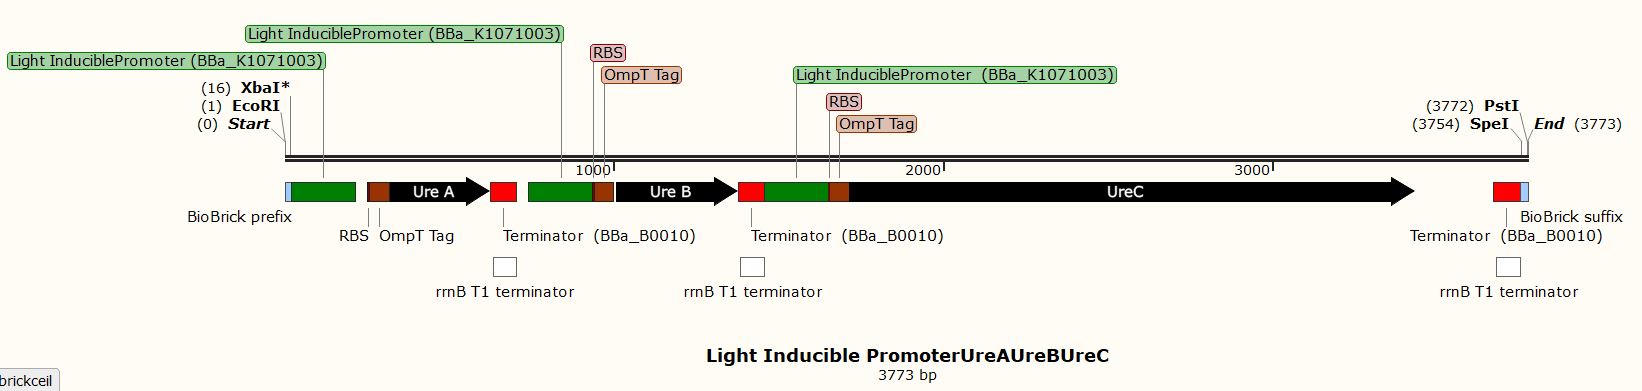
A biocementation insert with a light-inducible promoter promoter


These inserts were used to clone the vector (pSB1C3). The vector was cut with restriction enzymes EcoRI and XbaI and all the inserts were cut with the restriction enzymes EcoRI and SpeI to produce sticky and compatible ends. Since we cloned the inserts differently into five plasmids, we used a single fragment insert method.

Fig. In silico Cloning in SnapGene of a vector (pSB1C3) with biocementation insert with a light-inducible promoter promoter

Fig. Cloning History of the vector (pSB1C3) with biocementation insert with a low pH inducible promoter promoter
After the cloning was done, we ran an agarose gel simulation using SnapGene to check if inserts have been properly inserted into the vector. We used 1.0% Agarose and used GeneRulerTM 1kb DNA Ladder as the MW marker. We used a total of six lanes that had the first lane containing the DNA for the vector and the second to sixth lanes contained the DNA of the five recombinant plasmids. The description of each lane in this simulation are:
Lane 1: Uncloned Vector (pSB1C3)
Lane 2: Cloned vector with plastic biodegradation insert with a constitutive promoter
Lane 3: Cloned vector with plastic biodegradation insert with a high pH inducible promoter
Lane 4: Cloned vector with biocementation insert with a constitutive promoter
Lane 5: Cloned vector with biocementation insert with a low pH inducible promoter
Lane 6: Cloned vector with biocementation insert with a light-inducible promoter promoter
The results from the Gel electrophoresis can be found in the results section.
Fig. Agarose gel simulation of cloned Vector with the five different inserts